Hey beautiful! Are you searching for a stunning design to decorate your hands? Every girl loves a gorgeous henna pattern, and a well-done Palm Mehndi Design can make you feel extra special. It’s the perfect accessory for any festival or celebration .Henna has served as a beautiful form of body art for centuries.
A well-crafted mehndi design carries deep cultural significance across many traditions, symbolizing joy, luck, and celebration. Whether you are preparing for a major festival, a wedding, or simply want to explore a new creative outlet, mastering henna application is a rewarding skill. This guide explores the latest trends, offers easy tutorials for beginners, and shares expert secrets for achieving a flawless, dark stain.
Trending Palm Mehndi Designs
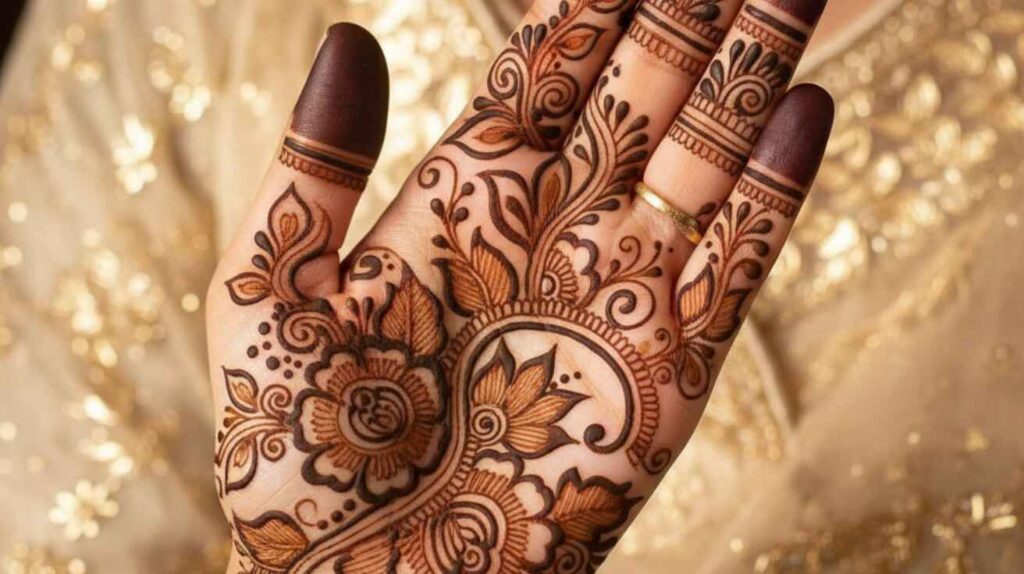
Henna artistry constantly evolves. Today, modern aesthetics blend seamlessly with traditional motifs. Minimalistic patterns are incredibly popular right now. These focus on keeping the center of the palm bare while framing the edges with delicate vines or dots.
Geometric layouts also dominate current trends. Artists use sharp lines, squares, and triangles to create striking, contemporary looks. Floral patterns remain a classic choice, but contemporary artists often scale them up, creating one large, bold lotus or rose right in the center of the hand.
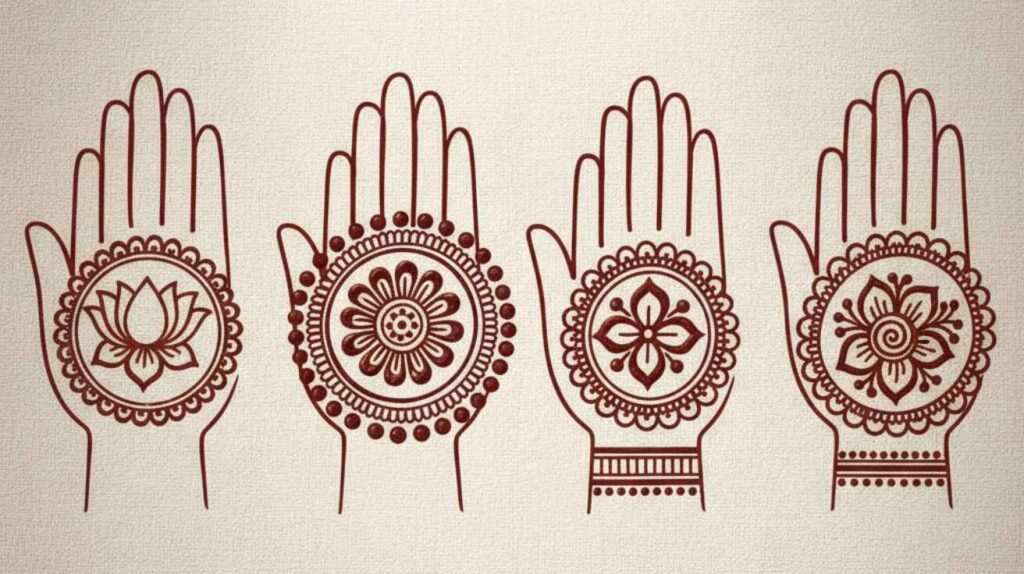
Simple Mehndi Designs for Beginners
Starting your henna journey does not require complex skills. A simple mehndi design relies on symmetry and clean lines rather than overwhelming detail.
Tips for you:
- Start with a simple vine pattern in the center of your palm.
- Use bold, solid lines for definition to make your design stand out.
- Practice making perfect ‘dots’ first, as they add delicate accents.
- Keep the pattern spaced out for a clean and modern look.
Dos and Don’ts:
- Do: Use a fresh henna cone for smooth, crisp lines.
- Don’t: Try to fill every empty space—openness keeps the design elegant.
- Do: Let the henna dry completely before scraping it off.
- Don’t: Apply too close to your wrist if you need quick drying.
Why I like this:
They dry very quickly and look elegant without taking much time. Even beginners can achieve great results, making them perfect for college or family functions.
To create a basic layout, start by drawing a small circle in the middle of your palm. Surround this circle with uniform scallops or flower petals. Next, add a few straight lines and dots along your fingers to complete the look.
Step-by-step beginner guide:
- Clean and dry your hands completely.
- Hold the henna cone like a pen, applying gentle pressure.
- Draw your central shape first.
- Work outward, adding simple borders or dots.
- Keep a tissue handy to wipe the cone tip regularly.
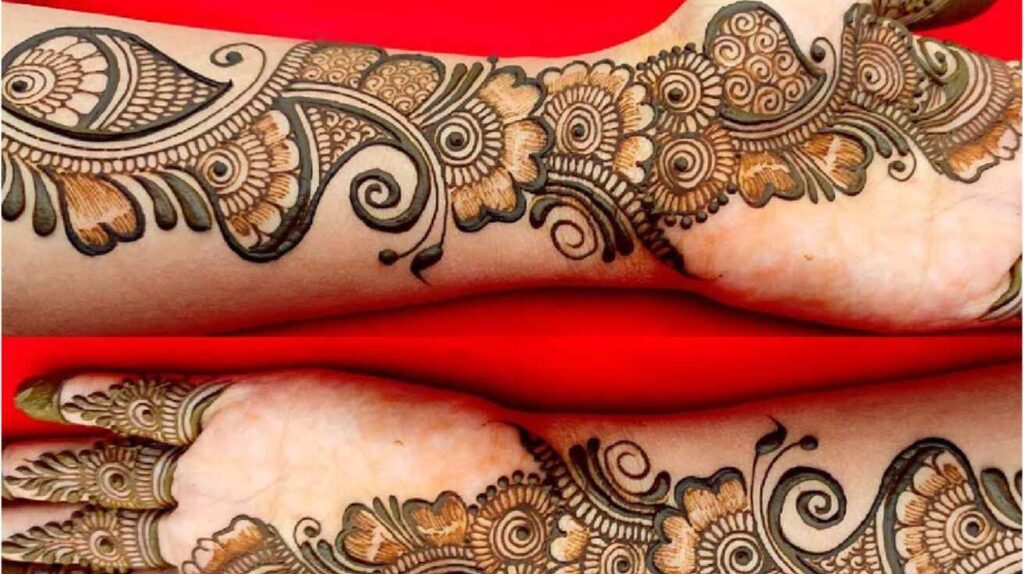
Arabic Palm Mehndi Designs
Arabic henna is famous for its elegant, flowing nature. Unlike dense traditional patterns, Arabic styles prioritize negative space. This allows the skin to show through, making the actual design pop.
Tips for you:
- Start with a simple vine pattern in the center.
- Use bold, solid lines for clear definition.
- Practice making perfect ‘dots’ first to add stylish details.
- Keep the pattern spaced out for a clean, open look.
Dos and Don’ts:
- Do: Use a fresh henna cone for smooth, fluid lines.
- Don’t: Try to fill every empty space—openness is key to the Arabic style.
- Do: Let the henna dry completely before scraping it off for the best stain.
- Don’t: Apply it too close to your wrist if you want it to dry quickly.
Why I like this: They dry very quickly and look elegant without taking much time. Even beginners can achieve great results, making them perfect for college or family functions.
Characteristics of this style include bold outlines, thick shading, and prominent floral or vine motifs. An Arabic palm mehndi design typically starts at the tip of the index finger and trails diagonally across the palm down to the wrist. This creates a visually pleasing, asymmetrical look that is both fast to apply and incredibly striking.
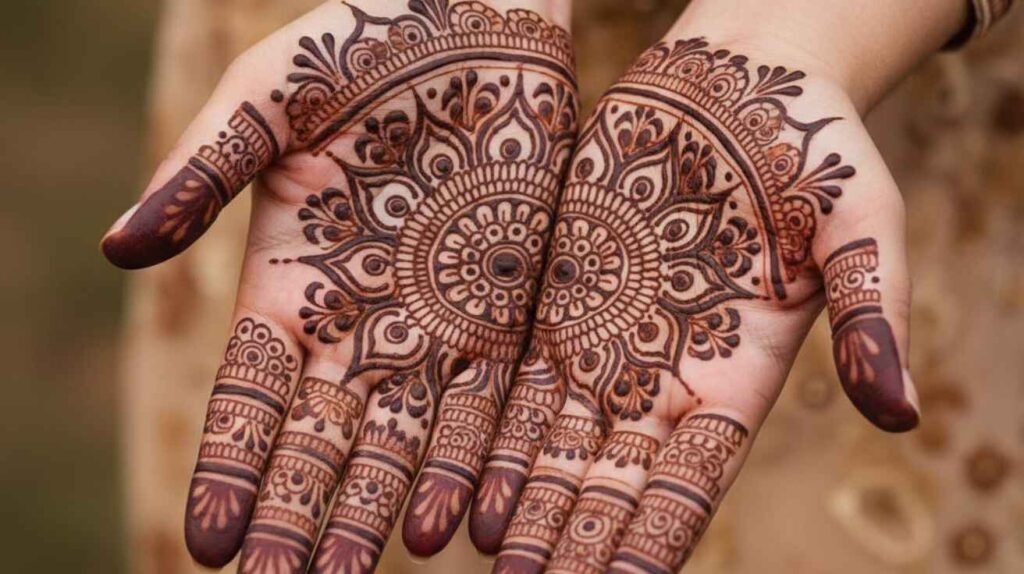
Mandala Palm Mehndi Designs
The mandala represents harmony and the universe. In henna art, it translates to a mesmerizing, circular pattern that radiates outward from the center of the palm.
Tips for you:
- Start with a simple vine pattern in the center.
- Use bold, solid lines for definition throughout the circles.
- Practice making perfect ‘dots’ first to accent the rings.
- Keep the pattern spaced out for a clean, balanced look.
Dos and Don’ts:
- Do: Use a fresh henna cone for smooth, even lines.
- Don’t: Try to fill every empty space—openness creates a striking mandala effect.
- Do: Let the henna dry completely before scraping it off.
- Don’t: Apply the design too close to your wrist if you need it to dry quickly.
Why I like this: These designs dry quickly and look elegant without taking much time. Even beginners can achieve great results. They’re perfect for college events or family gatherings.
Symmetry is crucial here. To practice, use a fine-tipped pen to mark a tiny dot in the exact center of your hand. Build concentric circles around it. Fill each ring with different elements like tiny leaves, teardrops, or grid work. Mandalas look intricate but are essentially just repeating basic shapes in a circular format.
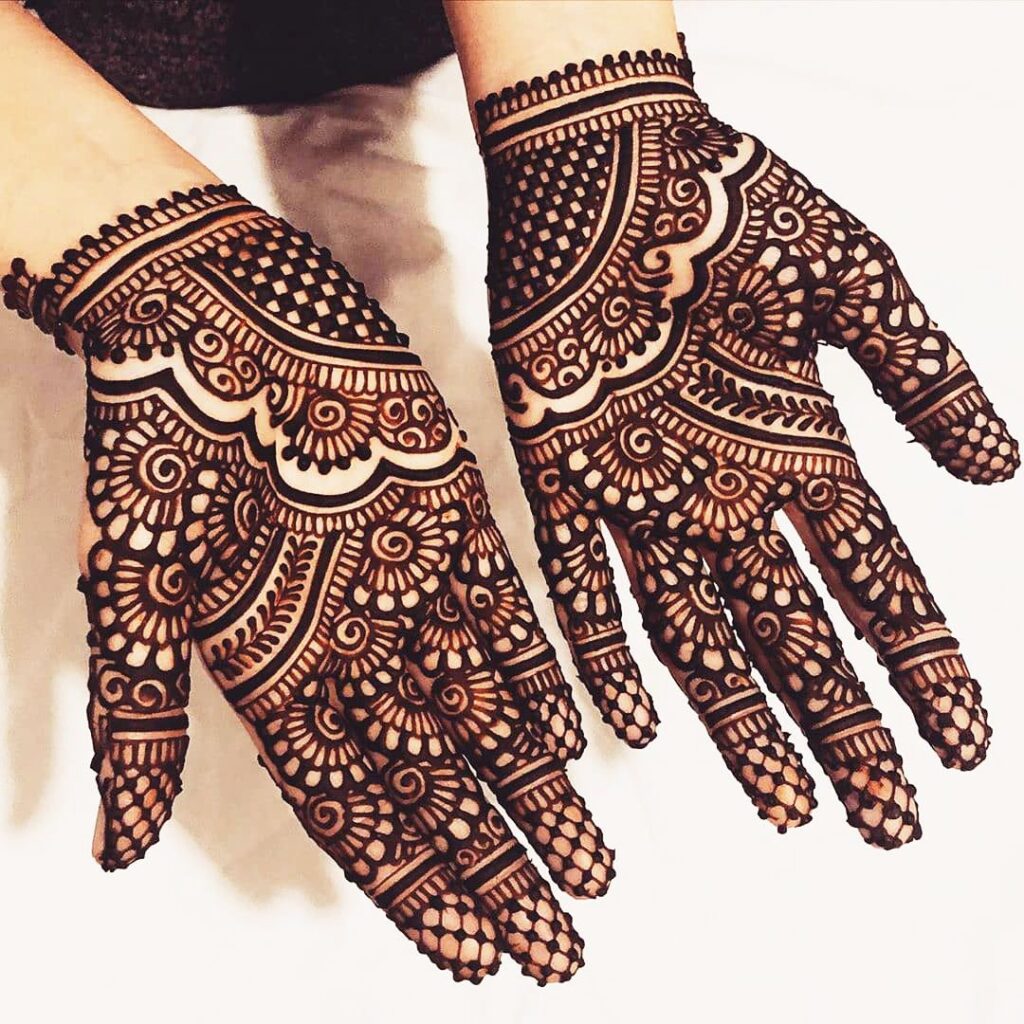
Full Palm Mehndi Designs for Weddings
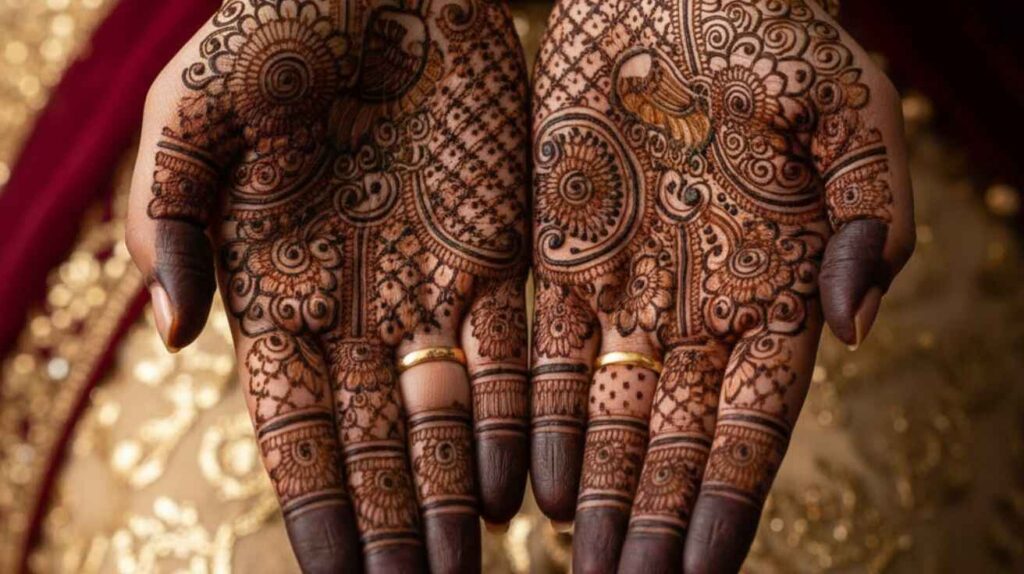
Bridal henna is a category of its own. A full palm mehndi design for a wedding features dense, heavily detailed artwork that covers every inch of the skin.
Tips for you:
- Start with a simple vine pattern in the center to anchor the design.
- Use bold, solid lines for definition throughout the pattern.
- Practice making perfect ‘dots’ first—they add rich detail and highlight focal points.
- Keep the pattern spaced out for a clean yet intricate look, so your mehndi doesn’t feel overwhelming.
Dos and Don’ts:
- Do: Use a fresh henna cone for smooth, consistent lines and crisp details.
- Don’t: Try to fill every empty space; some openness gives the design elegance and helps it dry faster.
- Do: Let the henna dry completely before scraping it off for the best results.
- Don’t: Apply too close to your wrist if you need the design to dry quickly.
Why I like this: These designs dry quickly and create an elegant effect without taking too much time. Even beginners can produce beautiful results, making these full palm patterns perfect for college or family functions.
These designs incorporate auspicious traditional motifs. You will frequently see peacocks, which symbolize beauty, and paisleys (mango shapes), representing luck and fertility. Artists also weave the groom’s initials into the intricate grid work, creating a fun search game for the couple after the wedding. Creating bridal henna requires patience, steady hands, and excellent cone control.
Quick and Easy Mehndi Designs
Sometimes you need beautiful henna without a massive time commitment. Quick designs utilize clever shortcuts. Focus on just the fingers or the very base of the palm. Striped patterns across the fingers paired with a simple wrist cuff look chic and take under ten minutes.
Tips for you:
- Start with a simple vine pattern in the center for an elegant touch.
- Use bold, solid lines for clear definition and crisp results.
- Practice making perfect ‘dots’ first; they add lovely accents fast.
- Keep the pattern spaced out for a clean, modern look.
Dos and Don’ts:
- Do: Use a fresh henna cone for smooth, precise lines.
- Don’t: Try to fill every empty space—openness makes the design stand out.
- Do: Let the henna dry completely before scraping it off.
- Don’t: Apply it too close to your wrist if you need quick drying.
Why I like this: They dry very quickly and always look elegant without taking much time. Even beginners can achieve great results, making these patterns perfect for college or family functions.
Stencils are another fantastic tool for fast application. Simply stick the adhesive stencil to your skin, spread a thick layer of henna paste over it, and peel it off to reveal a crisp, perfect design.
Tips for a Dark and Long-Lasting Stain
A great design deserves a rich, dark color. Proper pre- and post-application care makes a massive difference.
Before applying henna, wash your hands with soap to remove natural oils, but skip the lotion. Once the paste dries, avoid washing your hands with water for at least 12 hours. Instead, scrape the dried paste off gently.
Apply a mixture of lemon juice and sugar over the drying henna to keep it stuck to the skin longer. After removing the paste, rub a few drops of eucalyptus or coconut oil onto your palms to protect the stain and deepen the color.
FAQs
How long should I leave henna on my hands?
Leave the paste on your skin for at least 4 to 6 hours. For the darkest possible stain, leave it on overnight.
Why is my henna stain orange?
Fresh henna always leaves an orange stain initially. The color oxidizes over 24 to 48 hours, gradually deepening into a rich maroon or dark brown.
How can I make my mehndi fade faster?
If you need to remove henna quickly, soak your hands in warm salt water. Gently exfoliating the skin with a body scrub also helps speed up the fading process.
Can I use the same henna design for the back of my hand
Yes, many mehndi designs can be adapted for the back of your hand. Simple, symmetric patterns and Arabic trails work especially well on both sides.
What is the best way to get a darker color from my henna?
Use fresh, high-quality henna powder and apply a lemon-sugar mixture on the drying paste. After removing the dried paste, avoid water for several hours and apply natural oils like coconut or clove oil.
Are there any safe alternatives to natural henna?
Always choose natural henna over chemical or “black” henna, which can cause skin reactions. Look for pure, plant-based henna without additives.
How do I fix mistakes when drawing a mehndi design?
Keep a toothpick or Q-tip handy. While the paste is still wet, gently lift off any mistake, then redraw that section with a steady hand.
What simple fillers can I use in large palm mehndi designs?
Dots, small spirals, parallel lines, and tiny leaf shapes make easy and effective fillers that won’t crowd your design.
Can children use palm mehndi designs safely?
Yes, as long as you use fresh, natural henna without additives. Test a small area first and supervise application for the best results.
How long should I leave henna on my hands?
Leave the paste on your skin for at least 4 to 6 hours. For the darkest possible stain, leave it on overnight.
Why is my henna stain orange?
Fresh henna always leaves an orange stain initially. The color oxidizes over 24 to 48 hours, gradually deepening into a rich maroon or dark brown.
How can I make my mehndi fade faster?
If you need to remove henna quickly, soak your hands in warm salt water. Gently exfoliating the skin with a body scrub also helps speed up the fading process.
Ready to Create Your Own Henna Art?
Exploring mehndi design allows you to wear a unique piece of art that reflects your personal style. Whether you prefer a bold Arabic trail or a perfectly symmetrical mandala, practice is the key to mastering cone control. Grab a fresh cone of organic henna, try out a simple beginner pattern today, and enjoy the relaxing, creative process of mehndi art.
Hi, I’m Elizabeth Carter , the writer and creator behind Fashion Story Lane.
I launched Fashion Story Lane in 2025 as a dedicated space for women who love authentic, practical fashion and beauty advice rooted in real experience.
I have been writing about fashion and beauty for over 30 years. In that time, I have personally tested hundreds of skincare products, practiced Arabic and bridal mehndi on real clients, and reviewed fashion trends across South Asian and Western styles. Everything I publish on this site is something I have either tried myself or researched thoroughly before recommending.
When it comes to skincare, I always cross-check my advice with dermatologist guidelines because I believe your skin deserves accurate information , not just popular opinions. For mehndi, I draw from 10+ years of hands-on practice with different henna cones, designs, and techniques.
I am not a doctor or a certified dermatologist. But I am someone who has spent years learning, testing, and writing about these topics , and I always tell you what I genuinely believe, not what sounds good.
If you have a question about any article on this site, you can reach me through the contact page. I read every message personally.
Elizabeth