Mehndi has been a beloved tradition for centuries, and learning to apply beautiful designs on your front hand doesn’t have to be complicated. Whether you’re preparing for a wedding, festival, or just want to practice a new skill, mastering a front hand simple mehndi design is the perfect starting point for beginners.
The front hand offers a wonderful canvas for creativity. Unlike intricate bridal patterns that take hours to complete, simple designs can be stunning while remaining achievable for first-time learners. This guide will walk you through easy-to-follow ideas, practical tips, and different style categories that anyone can try at home.
Why Start with Simple Designs?
If you’ve never applied mehndi before, starting with complex patterns can feel overwhelming. Simple designs help you understand cone control, pressure application, and how henna flows. These foundational skills build your confidence naturally.
Beginners often worry about making mistakes, but the beauty of easy mehndi designs is that small errors blend into the overall pattern. You’ll learn faster when you’re not stressed about perfection. Plus, simple patterns still create gorgeous results that darken beautifully overnight.
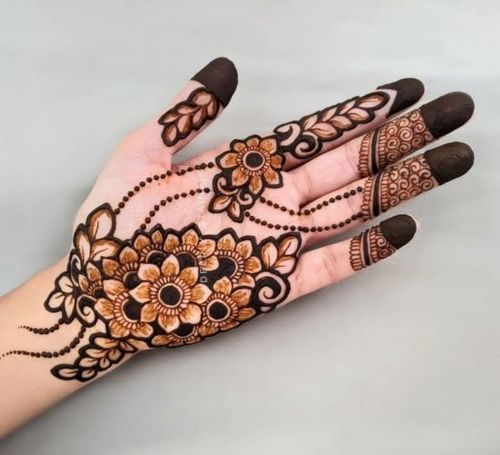
Minimal Mehndi – Less is More
Minimal style focuses on clean lines and open spaces. Think of delicate finger trails, small dots along the palm edge, or a single elegant vine running from your wrist to one finger. This beginner friendly mehndi design approach keeps things stress-free.
Start by drawing three simple leaves on your middle finger. Add tiny dots around them. That’s it. The empty space around your design actually makes it look more intentional and artistic. Many people love this modern aesthetic because it feels fresh and sophisticated.
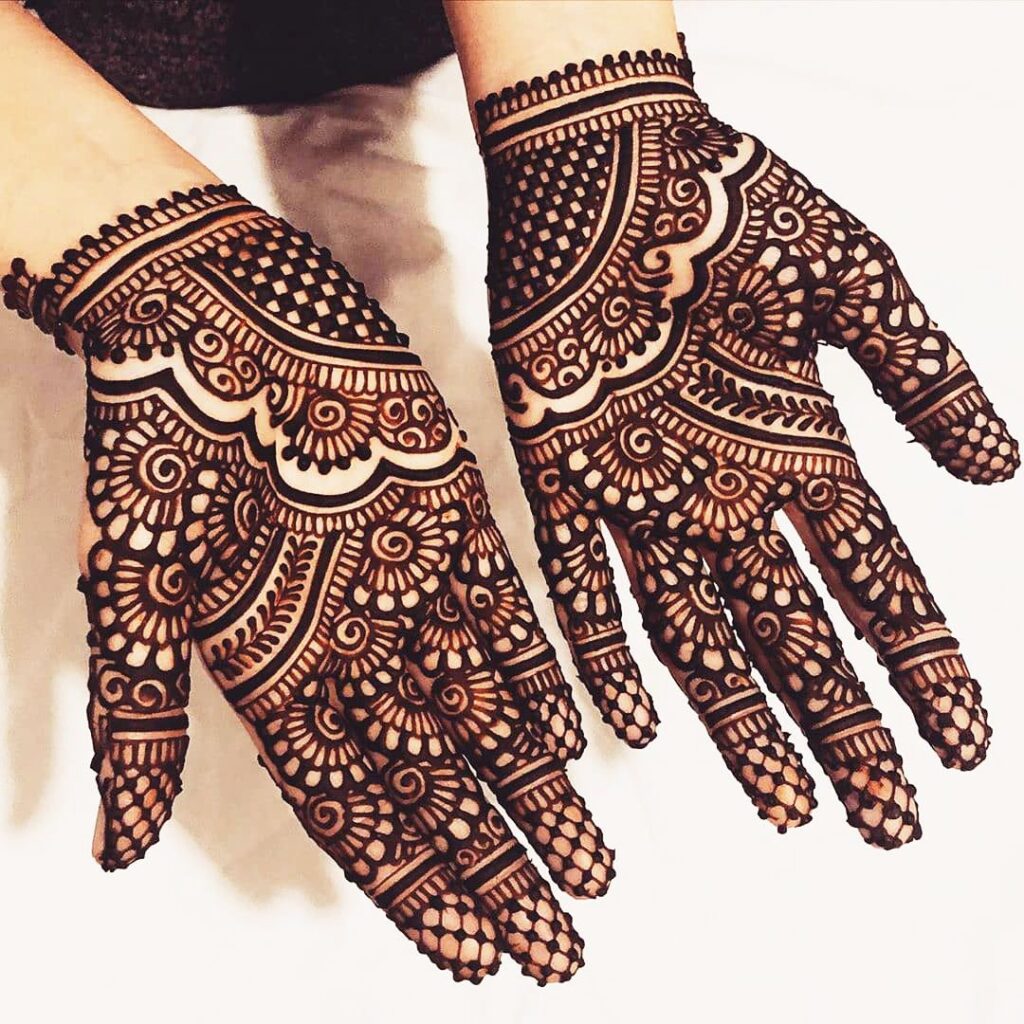
Floral Designs – Nature Inspired Beauty
Flowers are the most popular element in mehndi art, and they’re surprisingly easy to master. A front hand simple mehndi design with flowers typically includes one large bloom in the palm center with smaller petals radiating outward.
Begin with a small circle. Draw five rounded petals around it. Add another layer of petals between the first ones. Fill the center circle with dots. Congratulations, you’ve created your first flower! The front hand floral mehndi style can include roses, lotuses, or simple daisies depending on your preference.
Practice drawing flowers on paper first. Once you can create them smoothly, transferring the skill to skin becomes much easier. Remember that petals don’t need to be perfectly symmetrical—natural flowers aren’t either.
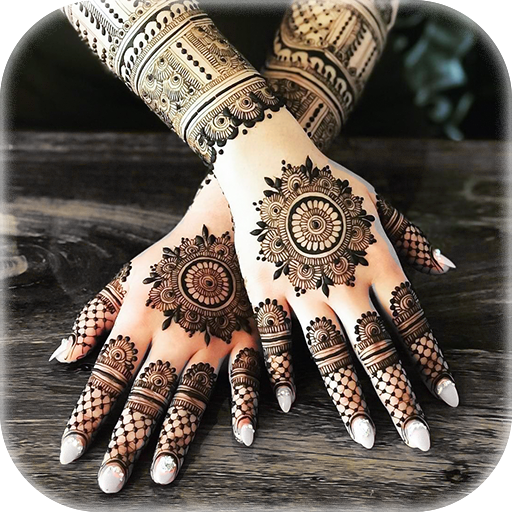
Tikki Mehndi – Bold and Beautiful
Tikki designs feature solid filled circles or round shapes, often placed on fingertips or palm centers. The front hand tikki mehndi creates dramatic contrast between filled and empty spaces. This style is incredibly forgiving for beginners because filling shapes is easier than drawing intricate lines.
Try placing a filled circle on each fingertip. Add a medium-sized tikki in your palm center. Connect them with thin curved lines. The solid shapes anchor your design while the connecting lines add flow. This combination looks impressive while remaining simple to execute.
Geometric Patterns – Modern and Clean
Geometric designs use triangles, squares, diamonds, and straight lines to create contemporary looks. These stylish mehndi ideas work beautifully for those who prefer structured patterns over flowing organic shapes.
Start with a diagonal line across your palm. Add small triangles along one side of the line. Mirror them on the other side. This creates a modern chevron effect. Geometric patterns teach you precision and steady hand control, which helps with all other mehndi styles later.
The wonderful thing about quick mehndi patterns using geometric shapes is that you can complete them in fifteen to twenty minutes. They dry faster due to less coverage, making them perfect for beginners who want immediate results.
Modern Mehndi Style – Contemporary Fusion
Modern designs blend traditional elements with current trends. You might see a front hand simple mehndi design that combines a classic paisley with negative space techniques, or traditional vines with minimalist dots.
This style gives you creative freedom. Maybe you love flowers but want a contemporary look—try drawing one large bloom with modern linear details inside instead of traditional filling. The modern front hand mehndi approach encourages experimentation while keeping application manageable.
Practice Tips for First-Time Learners
Before applying henna to your hand, practice these basic mehndi outlines on paper or glass. Draw simple curved lines, circles, and leaf shapes repeatedly. This muscle memory makes actual application smoother.
Keep your cone at a 45-degree angle and apply gentle, consistent pressure. Too much pressure creates thick blobs while too little makes broken lines. Finding this balance takes practice, but simple designs give you room to adjust as you learn.
Always start from the top of your design and work downward. This prevents smudging wet henna with your hand. If you make a mistake, let it dry completely before gently scratching it off with a toothpick.
Creating Natural Looking Patterns
The beauty of a natural henna pattern lies in its organic flow. Don’t force your design to be perfectly straight or measured. Mehndi looks most beautiful when it moves naturally with the curves of your hand.
Follow the natural lines of your palm and fingers. Notice how your hand creases and how your fingers taper. Designs that work with these natural features always look more harmonious than those fighting against them.
Learning from Professional Guidance
While practicing at home builds skills, learning from a professional mehndi artist accelerates your progress significantly. Experts can show you proper cone holding techniques, teach you how to achieve darker stains, and demonstrate pattern stability that prevents smudging.
A professional can identify small technical issues you might not notice yourself. They understand henna paste consistency, drying times for different climates, and how to prepare skin for better color uptake. Watching an experienced artist work reveals shortcuts and techniques that might take months to discover alone.
Many artists offer beginner workshops or simple lessons where you can practice under guidance. Following a local mehndi artist on social media also provides continuous learning opportunities through their tutorials and tips. This mentorship approach helps you avoid common beginner mistakes while developing your unique style faster.
Tips for Darker Stains
After applying your front hand simple mehndi design, leave the paste on for at least six hours—overnight is better. The longer the paste stays on your skin, the deeper the stain develops.
Once dried, scrape off the paste gently rather than washing it with water. Avoid water contact for twelve hours after removing the dried henna. Apply a mixture of lemon juice and sugar on the dried design before removing it. This helps seal the color.
Keep your hands warm after application. Heat helps the dye molecules penetrate skin better. Some people use clove steam or simply sit near a heater while their mehndi dries.
Common Beginner Mistakes to Avoid
Don’t apply henna too thick. Thick layers take forever to dry and often crack before the dye sets properly. Thin, consistent lines work best.
Avoid moving your hand too quickly while applying. Rushing creates wobbly lines and uneven patterns. Take your time—even a front hand simple mehndi design deserves patience and care.
Never blow on wet mehndi to dry it faster. This causes surface drying while the underneath stays wet, leading to smudging. Let it air dry naturally.
Building Your Skill Gradually
Start with just one or two fingers. Once those look good, add a small palm element. Gradually increase coverage as your confidence grows. There’s no rule saying you must cover your entire hand in one session.
Each time you practice, your hand becomes steadier and your patterns cleaner. Some beginners see dramatic improvement after just three or four attempts. The key is consistent practice with simple designs before attempting complex ones.
Take photos of each design you create. Looking back after a month of practice shows incredible progress that motivates continued learning.
Conclusion
Mastering a front hand simple mehndi design opens the door to a beautiful creative skill that you can enjoy throughout your life. Whether you prefer minimal modern looks or traditional floral patterns, starting simple makes the learning journey enjoyable rather than frustrating.
Remember that every expert mehndi artist started exactly where you are now—with their first wobbly line and uncertain hand. The difference between them and beginners isn’t talent; it’s simply practice and patience. Your unique style will develop naturally as you experiment with different patterns and techniques.
Pick up a cone, choose one simple design from this guide, and start creating. Your beautiful mehndi journey begins with that first stroke.
Frequently Asked Questions
How long should I keep mehndi on for dark color?
Keep henna paste on for six to eight hours minimum.
Which front hand design is easiest for beginners?
Minimal designs with simple lines and dots work best initially.
Can I practice mehndi designs on paper first?
Yes, practicing on paper builds cone control and pattern confidence.
Why is my mehndi color coming out light orange?
Removing paste too early or using old henna causes lighter stains.How do I prevent mehndi from smudging while drying?
Keep your hand still and elevated until completely dry naturally.
Hi, I’m Elizabeth Carter , the writer and creator behind Fashion Story Lane.
I launched Fashion Story Lane in 2025 as a dedicated space for women who love authentic, practical fashion and beauty advice rooted in real experience.
I have been writing about fashion and beauty for over 30 years. In that time, I have personally tested hundreds of skincare products, practiced Arabic and bridal mehndi on real clients, and reviewed fashion trends across South Asian and Western styles. Everything I publish on this site is something I have either tried myself or researched thoroughly before recommending.
When it comes to skincare, I always cross-check my advice with dermatologist guidelines because I believe your skin deserves accurate information , not just popular opinions. For mehndi, I draw from 10+ years of hands-on practice with different henna cones, designs, and techniques.
I am not a doctor or a certified dermatologist. But I am someone who has spent years learning, testing, and writing about these topics , and I always tell you what I genuinely believe, not what sounds good.
If you have a question about any article on this site, you can reach me through the contact page. I read every message personally.
Elizabeth